Welcome to my ultimate guide on caring for the philodendron scandens, a plant that has brought endless joy to my home and many others. This heartleaf philodendron is more than just a pretty face—it’s a low-maintenance companion that purifies the air and thrives in indoor conditions. Whether you’re a seasoned plant parent or just starting your green journey, this guide is here to help you keep your philodendron happy and healthy all year round.
From bright, indirect sunlight to well-draining soil and a consistent watering schedule, I’ll share everything I’ve learned through personal experience and trusted sources. We’ll also touch on important topics like pet toxicity and the benefits of air purification. By the end of this guide, you’ll feel confident in your ability to nurture your philodendron scandens, whether you’re propagating it or simply giving it the TLC it deserves.
So, let’s dive in and explore the simple yet effective ways to care for this stunning heartleaf philodendron. Your journey to becoming a plant expert starts here!
Understanding the Origins and Varieties
The Philodendron Scandens, commonly known as the Heartleaf Philodendron, traces its origins back to the lush rainforests of Central and South America. This plant has naturally adapted to thrive in environments with moderate light, which is a key factor in its indoor care. Its growth habits, such as climbing on trees, have evolved to maximize light exposure without direct sunlight, a trait that guides its placement in our homes.
Exploring Its Rainforest Roots
In its natural habitat, the Heartleaf Philodendron uses its roots to climb up trees, allowing it to reach higher levels where light is more abundant. This unique growth pattern influences how we care for it indoors, often using supports to mimic its natural climbing behavior. Understanding its roots in the rainforest helps in replicating the right conditions for healthy growth.
Popular Varieties and Their Unique Traits
Among the popular varieties, the ‘Brasil’ stands out with its vibrant, variegated leaves, adding a pop of color to any space. The ‘Micans’ variety, with its heart-shaped, velvety leaves, offers a softer texture that many find appealing. Each variety has distinct leaf patterns and colors, making them stand out while maintaining the plant’s low-maintenance nature. These variations not only enhance aesthetics but also provide options for different interior décors, all while requiring similar care rooted in their rainforest origins.
By appreciating the natural history and diversity of the Heartleaf Philodendron, we can better understand how to nurture it in our homes, ensuring it thrives just as it does in its native environment.
Ideal Lighting and Temperature Conditions
Creating the right environment for your plant involves understanding its lighting and temperature needs. Proper conditions ensure healthy growth and vitality.
Direct vs. Indirect Sunlight
Direct sunlight can be harsh, potentially burning the leaves. Indirect light is preferable, especially during peak sun hours.
Place your plant near a window for bright, filtered light. This setup mimics its natural habitat and promotes robust growth.
Temperature Guidelines for Year-Round Health
Maintain a temperature above 55°F (13°C) to keep your plant thriving. Avoid placing it near drafts or extreme cold sources.
Stable temperatures support consistent growth. Be mindful of seasonal changes, adjusting placement as needed to maintain ideal conditions.
| Type of Light | Recommended Placement | Effects on Plant |
|---|---|---|
| Direct Sunlight | Away from windows during midday | Can cause leaf scorch |
| Indirect Sunlight | Near east- or west-facing windows | Promotes healthy leaf growth |
By optimizing lighting and temperature, you create a nurturing environment for your plant. Monitor seasonal changes and adjust care routines to ensure year-round health and vitality.
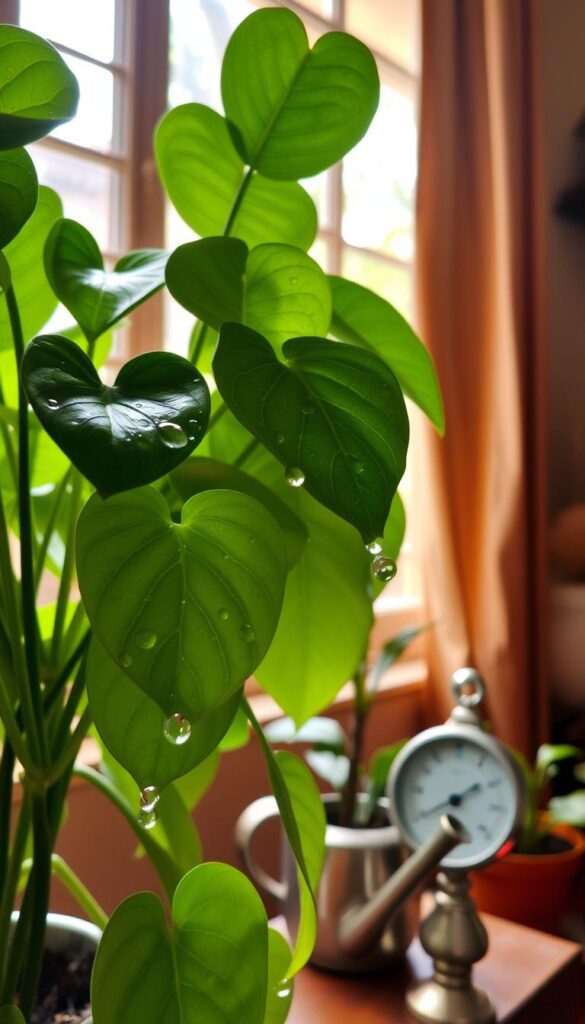
Watering and Humidity Tips
Proper watering and maintaining the right humidity are crucial for the well-being of your plant. Overwatering can lead to root rot, while insufficient moisture might cause the leaves to wilt. Let’s explore how to strike the perfect balance.
Watering Frequency and Techniques
I water my plant about once a week during summer and every two weeks in winter. This schedule ensures the soil stays moist but not soggy. To check if it’s time to water, I insert my finger into the soil up to the first knuckle. If the soil feels dry, it’s time for a drink. I use about 0.5 cups of water, adjusted based on the season.
Avoid getting water on the leaves to prevent fungal growth. Instead, water at the base, allowing the soil to absorb the moisture. This method helps prevent root rot and keeps the plant healthy.
Managing Indoor Humidity Levels
Humidity is another important factor. Using a pebble tray with water can increase the surrounding humidity without overdoing it. I place the plant pot on the tray, ensuring it doesn’t sit in the water. Mist the leaves occasionally, especially during dry seasons, to maintain humidity levels.
While higher humidity is beneficial, be cautious not to overhumidify. Too much moisture can lead to root rot. I monitor the plant’s environment to ensure it’s thriving without excessive dampness.
Here are some key tips to keep in mind:
- Water once a week in summer and every two weeks in winter.
- Check soil moisture by inserting your finger into the soil.
- Use a pebble tray to maintain humidity without overwatering.
- Mist leaves occasionally to support humidity needs.
- Be cautious of overwatering to prevent root rot.
Remember, your plant is toxic to pets if ingested, so keep it out of reach. By following these watering and humidity tips, you’ll help your plant stay lush and healthy all year round.
Soil, Fertilizer, and Repotting Essentials
When it comes to nurturing your plant, the right soil, fertilizer, and repotting routine are essential for healthy growth. These elements work together to create a nurturing environment that supports your plant’s development throughout the year.
Choosing the Right Soil Mix
A high-quality potting soil is the foundation of a thriving plant. I recommend using a rich, loose potting soil that drains well and is rich in organic matter. Adding peat or coconut pulp can enhance the soil’s structure and stimulate growth. Avoid using garden soil, as it can compact and prevent proper drainage.
Fertilizing Practices and Repotting Schedule
Fertilizing is crucial during the growing season. I fertilize every two weeks in the summer using a balanced, water-soluble fertilizer. This provides the necessary nutrients for healthy leaf growth and vibrant colors.
Repotting every 2-3 years is necessary to prevent the plant from becoming root-bound. Look for signs like slow growth or roots growing out of the pot. When repotting, choose a pot that is only slightly larger than the current one to maintain moisture levels.
Here are some key tips to keep in mind:
- Use a well-draining potting soil mix with organic matter.
- Fertilize every two weeks during the summer months.
- Repot every 2-3 years to prevent root crowding.
- Check for signs that indicate the need for repotting, such as slow growth or visible roots.
https://www.youtube.com/watch?v=CIiIu2d_ipw&pp=ygUTI3BoaWxvZGVudHJvbnBsYW50cw%3D%3D
By following these guidelines, you’ll provide your plant with the nutrients and space it needs to flourish. Remember, consistent care and attention to these details will significantly impact your plant’s overall health and vitality.
Pruning, Propagation, and Growth Techniques
Pruning and propagation are essential skills for any plant enthusiast. These techniques not only help maintain your plant’s appearance but also encourage healthy growth. Let’s explore how to prune effectively and propagate new plants with ease.
Pruning for Fuller, Lusher Growth
Pruning is more than just trimming. It’s an art that shapes your plant and promotes robust growth. By pinching back stems after a node, you encourage the plant to grow fuller and prevent it from becoming leggy. This simple technique stimulates new growth and keeps your plant looking lush and vibrant.
Regular pruning also helps maintain a neat appearance. It directs the plant’s energy towards producing denser foliage, creating a more appealing display. With each careful cut, you guide the plant towards healthier, more vigorous growth.
Step-by-Step Propagation Methods
Propagation is a rewarding process that allows you to share or expand your plant collection. Here’s how I propagate using stem cuttings:
- Choose a healthy stem with at least two nodes.
- Cut just above a node using clean scissors or a knife.
- Remove lower leaves, leaving two to three at the top.
- Place the cutting in water, changing it weekly.
- Roots will develop within weeks; then, pot the new plant.
This method is simple and effective, ensuring successful propagation every time.
| Propagation Method | Pros | Cons |
|---|---|---|
| Water Stem Cuttings | High success rate, easy to monitor | Requires frequent water changes |
| Soil Cuttings | Strong root development, low maintenance | Slower to root, less visible progress |
By following these steps, you can enjoy the rewards of nurturing your plant and sharing it with others. Remember, each cut is an opportunity for new growth and a fuller, healthier plant.
Identifying and Resolving Plant Problems
Plants, like all living things, can encounter issues. Yellowing leaves or droopy stems are common signs that something might be amiss. Let’s explore how to identify and address these problems effectively.
Managing Overwatering and Root Rot Risks
One of the most common issues is overwatering, which can lead to root rot. If you notice yellow or drooping leaves, it might indicate that your plant is suffering from too much water. To address this:
- Adjust your watering schedule, ensuring the soil isn’t consistently soggy.
- Inspect the roots for any signs of rot, and if found, consider repotting with fresh soil.
Preventing overwatering is key, as root rot can quickly escalate if left untreated.
Troubleshooting Pests and Yellow Leaves
Yellow leaves can also signal pest infestations or nutrient deficiencies. Check the underside of leaves for pests and treat promptly if necessary. Nutrient deficiencies might require adjusting your fertilizer routine. Acting early on these signs can prevent more severe issues.
By staying vigilant and addressing problems early, you can help your plant thrive and enjoy its beauty for years to come.
My Personal philodendron scandens care guide
My journey with heartleaf philodendrons began when I first saw their delicate, heart-shaped leaves. I was captivated by their beauty and decided to bring one home to enhance my space.
My Journey with Heartleaf Philodendrons
I remember the first time I propagated a heartleaf philodendron using stem cuttings. It was a mix of excitement and nervousness, but seeing those tiny roots develop was incredibly rewarding. Over time, I’ve learned to recognize when my plant needs more water or light, adjusting my routine to ensure it stays healthy.
One of the biggest challenges was figuring out the right balance of water and humidity. I found that using a pebble tray helped maintain the perfect moisture levels without overwatering. It’s these little adjustments that make all the difference in keeping my heartleaf philodendron thriving.
Through trial and error, I’ve discovered that consistency is key. Regular watering, proper sunlight, and occasional pruning keep my plant looking its best. It’s a journey of learning and growth, both for me and my heartleaf philodendron.
Caring for these plants isn’t just about following guidelines; it’s a personal journey. Every triumph and challenge brings me closer to understanding what my plant needs. It’s this connection that makes nurturing a heartleaf philodendron so fulfilling.
Wrapping It Up: Final Thoughts and Takeaways
Wrapping It Up: Final Thoughts and Takeaways
Caring for your plant is all about embracing easy care routines that bring life and beauty to your space. Start by placing it in a spot with bright, indirect sunlight—ideal for its growth. Remember to water weekly, adjusting as the seasons change, and ensure the soil stays moist but not soggy.
Small adjustments can make a big impact. Moving the stem by just an inch or repotting during a different season can shape its growth. Reflecting on my journey, I’ve found these tips help my plant thrive year after year, even in America’s varied climates.
Each season brings its own needs, so stay attentive to details like watering and humidity. By adapting these best practices to your home, you’ll nurture a healthy, vibrant plant. Make sure to keep it out of your pet’s reach and enjoy the rewarding experience of easy care and growth.