Hey there! I’m thrilled to share my journey with the Philodendron Squamiferum, a houseplant that has stolen my heart with its striking appearance and unique charm. Native to the lush regions of South and Central America, this plant boasts large, dark green leaves and distinctive hairy, reddish stems that add a touch of the tropics to any room.
As someone who’s passionate about houseplants, I can attest that the Philodendron Squamiferum is a standout. It’s not just about looks—this plant thrives in bright, indirect light and loves a well-draining aroid mix. Regular watering and high humidity will keep it happy, but be mindful: it’s toxic to pets and children, so placement matters.
In this guide, I’ll walk you through everything you need to know to keep your Philodendron Squamiferum flourishing. From lighting and watering to propagation and soil selection, I’ll share practical tips and personal insights gathered from years of nurturing this incredible plant. Whether you’re a seasoned plant parent or just starting out, you’ll find valuable information here to help your Philodendron Squamiferum thrive.
Understanding My Philodendron Squamiferum
Let’s dive into what makes the Philodendron Squamiferum so special. This plant is a true standout in the world of houseplants, and its unique features are a big part of its charm.
Key Features & Unique Traits
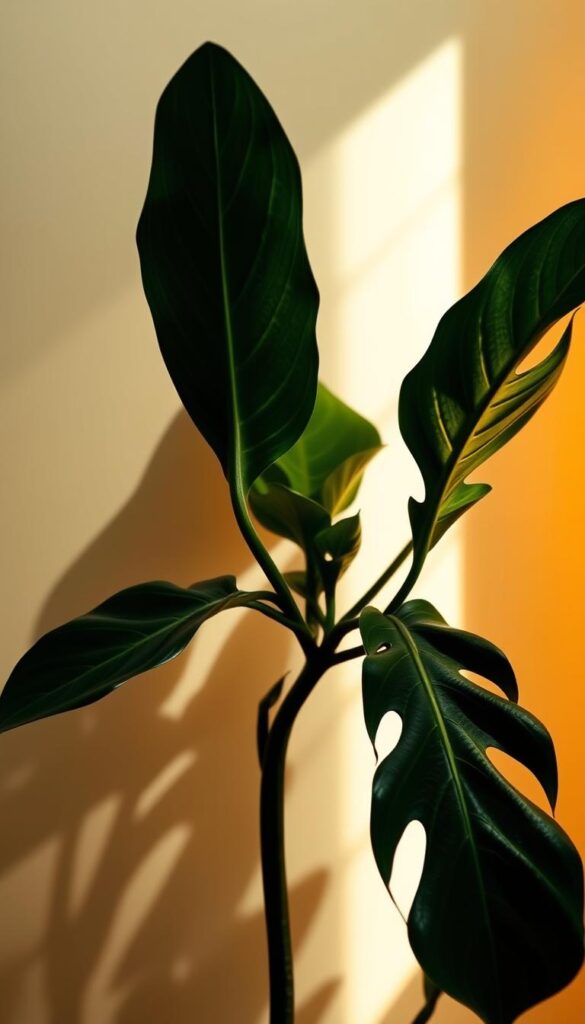
The Philodendron Squamiferum boasts large, dark green leaves with deep lobes, giving it a distinctive appearance. One of its most striking features is the hairy, red-tinted stems that add a pop of color and texture. As the plant matures, the leaves become even more intricate, with the lobes deepening and the overall shape becoming more dramatic.
What really sets the Philodendron Squamiferum apart is its ability to adapt. Younger plants have smaller, less complex leaves, but as they grow, the foliage becomes more elaborate. This evolution in leaf shape is a fascinating process to witness and adds to the plant’s visual appeal.
Origin and Natural Habitat
Native to the tropical rainforests of South and Central America, the Philodendron Squamiferum thrives in environments with filtered light and consistent moisture. Understanding its natural habitat helps explain why it loves bright, indirect light and high humidity when grown indoors.
These traits not only make the Philodendron Squamiferum a beautiful addition to your home but also influence how you care for it. By replicating its natural conditions, you can help your plant flourish.
Lighting, Temperature & Humidity Essentials
Creating the right environment for your plant is crucial for its health. Let’s explore how to optimize lighting, temperature, and humidity for your Philodendron Squamiferum.
Ideal Light Conditions and Placement
Bright, indirect light is perfect for this plant. Placing it near an east- or west-facing window provides the ideal setting. If direct sunlight is unavoidable, sheer curtains can help filter the light. I’ve found that keeping my plant away from harsh afternoon sun prevents leaf scorch.
Managing Indoor Temperature and Humidity
Keep your plant in an area with temperatures between 50°F and 75°F, avoiding drafts. For humidity, aim for levels above 50%. Using a humidifier or grouping plants can help maintain the right moisture. In drier climates, monitoring air quality and adjusting placement ensures optimal conditions.
Watering & Soil: Nurturing Strong Roots
Proper watering and soil selection are vital for the health of your plant. Let’s explore how to get it just right.
Best Watering Practices
Watering is an art. I water my plant when the top few inches of soil feel dry to the touch. Overwatering can lead to root rot, so it’s better to err on the side of caution. Good drainage is key to preventing waterlogged soil.
Allowing the soil to dry slightly between waterings encourages healthy root growth. This balance ensures the roots stay strong and the plant thrives.
Selecting the Perfect Soil Mix
The ideal soil mix is a blend of orchid bark, perlite, and peaty soil. This combination ensures excellent drainage and aeration. Perlite helps prevent waterlogging, while peaty soil retains necessary moisture.
A well-draining mix supports a vigorous root system. I’ve learned that monitoring moisture levels is crucial for maintaining healthy roots. Proper drainage and the right soil mix create a strong foundation for your plant to flourish.
Fertilizing & Repotting Techniques
Nurturing your plant goes beyond just water and light. Fertilizing and repotting are essential steps to ensure your plant stays healthy and thrives.
Choosing the Right Fertilizer
During the growing season, which runs from spring through summer, your plant benefits from a light, organic fertilizer. I fertilize my plant once a month during this period, using a diluted solution to avoid overwhelming the roots. This approach provides the necessary nutrients without causing harm.
When and How to Repot
Repotting is crucial every few years or when you notice roots emerging from the drainage holes. Choose a pot slightly wider than the current one to give the roots room to grow. Spring or summer is the best time for repotting, as the plant is actively growing and can recover quickly. Refresh the soil mix to ensure proper drainage and aeration, which supports healthy root development. Remember, over-fertilizing can harm your plant, so it’s important to flush excess salts from the soil periodically to maintain a balanced nutrient cycle.
Pruning & Propagation Methods That Work
Maintaining your plant’s health involves more than just watering and fertilizing. Pruning and propagation are essential techniques to keep your plant thriving and multiplying.
Pruning for Better Growth and Form
Pruning is a simple yet effective way to shape your plant and encourage healthy growth. I recommend using clean, sharp tools to prevent infections. By trimming dead or overgrown branches, you allow more light to reach the healthier parts of the plant, stimulating new growth and keeping it bushy.
Regular pruning also helps maintain the plant’s size and appearance. I like to prune my plant during the growing season when it’s actively producing new leaves. This approach ensures the plant stays full and vibrant, while also giving me a chance to propagate new cuttings.
Simple Steps for Stem Cutting Propagation
Propagating your plant through stem cuttings is a rewarding process. Start by selecting a healthy stem with at least one node and a few leaves. Cut the stem just below a node using clean tools to minimize the risk of infection.
Once you’ve taken the cutting, you can either place it in water or directly in well-draining soil. I prefer water because it allows me to monitor the root development. Once the roots are about an inch long, it’s time to repot the cutting into soil. This method ensures a high success rate and allows you to share plants with friends or expand your collection.
Troubleshooting Common Plant Problems
Every plant parent runs into issues now and then. Recognizing these early and taking action can save your plant from serious harm.
Identifying Signs of Overwatering and Root Rot
Overwatering is a common issue that can lead to root rot. Here’s how to spot it:
- Leaves turning yellow or drooping
- Soft, mushy stems
- Brown spots on leaves
If you notice these signs, stop watering immediately. Let the soil dry out a bit before the next water. Improving drainage and using well-draining soil can help prevent root rot.
Managing Pests and Leaf Issues
Pests can stress your plant. Keep an eye out for spider mites and fungus gnats.
- Spider mites cause yellow spots or fine webbing
- Fungus gnats are tiny flies around the soil
Treat infestations with insecticidal soap or neem oil. Isolate infected plants to prevent spread and adjust watering to prevent attracting pests.
Regular checks and maintaining a balanced environment are key to preventing recurring issues. Adjust your care routine as needed to keep your plant healthy and thriving.
Comprehensive philodendron squamiferum care guide
As I continue to share my journey with the Philodendron Squamiferum, I want to pass on some personal tips and tricks that have made a big difference in keeping my plant thriving. These insights are born from hands-on experience and a bit of trial and error, so I hope they’ll be just as helpful for you!
My Personal Tips and Tricks
One of the most effective things I’ve learned is the importance of providing support. Since the Philodendron Squamiferum is a climbing plant, giving it a moss pole or trellis can really maximize its growth potential. It’s amazing to watch the plant use its aerial roots to climb and develop even more stunning foliage.
Another tip I swear by is rotating the plant regularly. This simple habit ensures even growth and keeps the plant looking balanced. Plus, it’s a great excuse to interact with your houseplant a little more often!
Humidity is another key area where I’ve found creative solutions. If you don’t have a humidifier, placing the plant on a tray filled with water and pebbles can help maintain the right moisture levels. Just be sure the pot isn’t sitting directly in the water to avoid root rot.
Finally, I’ve noticed that regular maintenance goes a long way. Dusting the leaves with a damp cloth and checking for pests during watering can prevent a lot of potential issues down the line. It’s all about being proactive and giving your plant the TLC it deserves.
By incorporating these tips into your care routine, you’ll be well on your way to growing a healthy, vibrant Philodendron Squamiferum that brings joy and beauty to your home.
Wrapping Up My Plant Journey
As I wrap up my journey with the Philodendron Squamiferum, I want to summarize the key takeaways from this comprehensive guide. Consistent watering, proper light, and suitable soil are essential for your plant’s health. Over time, I’ve seen significant improvements in growth and overall well-being by following these practices.
Remember to place your plant in a spot with bright, indirect light, especially during spring and summer. Make sure the environment stays humid, using methods like a humidifier or water tray. Keep the pot in an area where temperatures range between 50°F and 75°F, avoiding drafts.
Regularly monitor your plant’s height and adjust its placement as needed. During summer, ensure it’s not too close to direct sunlight, which can cause leaf scorch. Water when the top inch of soil feels dry, avoiding overwatering that might lead to root rot.
Finally, always remember that your plant is toxic to pets and children, so place it safely out of reach. By following these tips and staying proactive, you’ll enjoy a thriving, vibrant plant that brings beauty to your home. Don’t hesitate to share your experiences and keep learning—happy planting!