I still remember the day I brought home my philodendron. It was small, sitting in a tiny pot, and full of life. Over time, it grew into a stunning, oversized plant that became the centerpiece of my living room. But as much as I loved it, I noticed something was off—its growth slowed, and the leaves didn’t look as vibrant as before.
That’s when I realized it was time to repot my philodendron. Repotting is more than just moving a plant to a bigger container. It’s about giving it room to breathe, fresh soil to thrive in, and a chance to grow even stronger. When I finally repotted my philodendron, I was amazed at how quickly it bounced back. The leaves regained their glossy appearance, and new growth started popping up everywhere.
But knowing when and how to repot is key. I look for signs like roots circling the pot or poking out of the drainage holes. These are clear indicators that my plant needs more space. By moving it to a larger pot, I’m giving the roots room to expand, which leads to healthier growth and a fuller appearance.
Repotting isn’t just about solving a problem; it’s an opportunity to enhance your plant’s overall health. With the right soil, a bit of care, and some patience, you can help your philodendron reach its full potential. In this guide, I’ll walk you through everything I’ve learned, from the best time to repot to the practical tips that will make the process smooth and stress-free for both you and your plant.
Understanding Your Philodendron’s Unique Needs
Every philodendron has its own rhythm of growth and specific needs. To keep my plant thriving, I’ve learned to pay close attention to its health and environment. This attention helps me determine when it’s time for a change, like moving to a bigger pot or adjusting its care routine.
Recognizing Signs of Root-Bound Growth
One clear indicator that my philodendron needs attention is when its roots start to circle the inside of the pot or even poke out through the drainage holes. This is a sign that the plant has outgrown its current container and needs more space to expand. I’ve noticed that when the roots become too crowded, the plant’s growth slows down, and the leaves might not look as healthy as they once did.
Observing Leaf and Soil Health
Another way to assess my plant’s health is by checking the leaves and soil. If the leaves start to yellow or droop, it could be a sign that the soil isn’t providing the right nutrients. I also pay attention to how quickly the soil dries out. If it’s drying too fast, it might mean the roots are struggling to get enough water. These observations help me decide if it’s time to repot or adjust my watering schedule.
By monitoring these signs, I can ensure my philodendron stays healthy and continues to grow strong. It’s all about understanding its unique needs and responding with the right care at the right time.
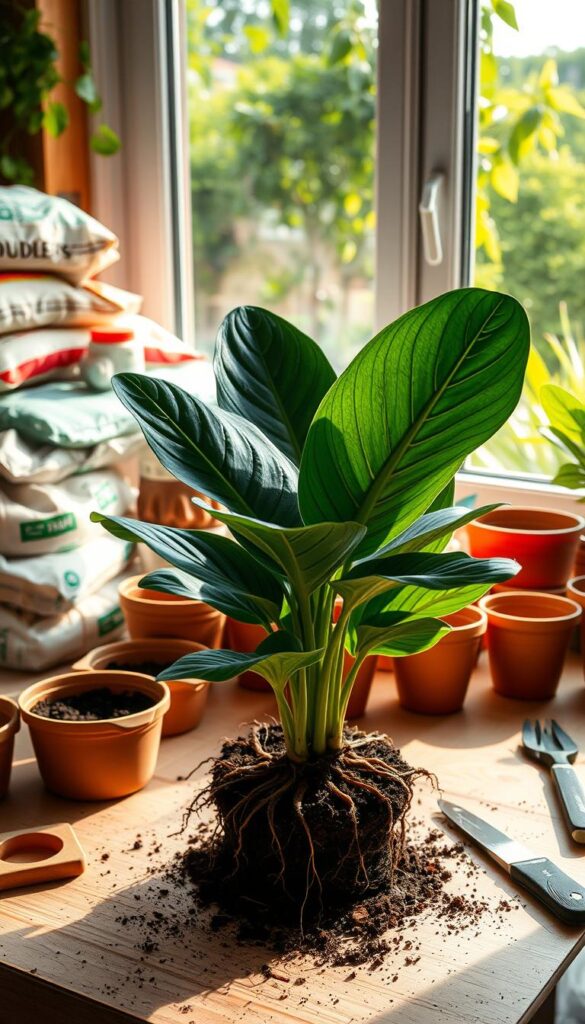
Gathering Materials and Preparing Your Space
When it comes to repotting your philodendron, having the right materials and a well-prepared workspace can make all the difference. I always start by gathering everything I need to ensure the process is smooth and stress-free for both me and my plant.
Identifying the Right Tools and Potting Mix
The essential tools for repotting include a larger pot with drainage holes, high-quality potting mix, pruning shears, and a watering can. I also find gloves helpful to keep my hands clean and protected. The potting mix should be well-draining to prevent waterlogged soil, which can harm the roots. I recommend using a mix specifically designed for tropical plants, as philodendrons thrive in such conditions.
| Material | Description |
|---|---|
| Larger Pot | A pot with drainage holes to ensure proper water flow and root health. |
| Potting Mix | A well-draining mix suitable for tropical plants to maintain soil balance. |
| Pruning Shears | For gently trimming old or damaged roots to promote healthy growth. |
| Watering Can | For gentle watering to settle the soil around the roots after repotting. |
| Gloves | Optional, to protect hands from soil and potential plant sap. |
Setting Up a Comfortable Work Area
Creating a clean and organized workspace is crucial. I lay down old sheets or newspapers to catch any spilled soil or water. Having everything within arm’s reach saves time and reduces stress. I also ensure the area is well-lit so I can see the roots and soil clearly. Proper drainage is a key factor, so I always check the bottom of the pot for holes before starting.
Step-by-Step Guide: how to repot a large philodendron
Repotting a large philodendron can seem daunting, but with the right approach, it can be a smooth process. The key is to handle the plant with care and follow a structured method to ensure minimal stress and optimal results.
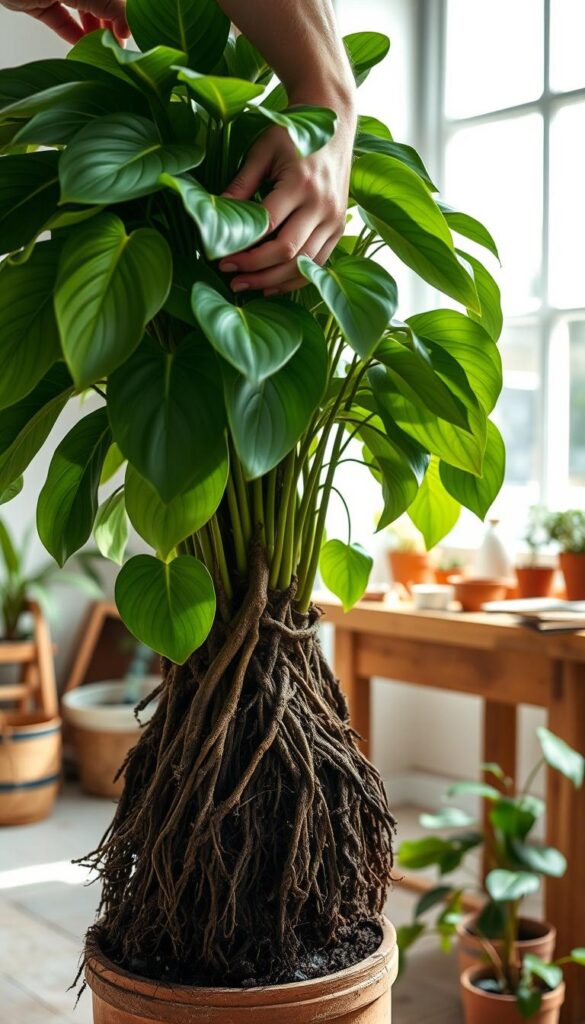
Safely Removing the Plant from Its Current Pot
To start, gently tilt the pot on its side. This allows the plant to slide out more easily. Tapping the sides of the pot helps loosen the root ball. Once the plant is out, inspect the roots to ensure they’re not circling excessively, which can hinder growth.
Transplanting Techniques for Minimal Stress
Place the plant in the new pot, ensuring the root ball is centered. Keep the soil level consistent with the previous pot to avoid transplant shock. Water gently to settle the soil around the roots. This step helps maintain moisture and supports the plant’s adjustment to its new environment.
| Step | Action | Purpose |
|---|---|---|
| 1 | Tilt the pot sideways | Eases plant removal |
| 2 | Tap pot edges | Loosens root ball |
| 3 | Center plant in new pot | Ensures even growth |
| 4 | Water gently | Settles soil, maintains moisture |
By following these steps, you can repot your philodendron with confidence. Remember, gentle handling and consistent soil levels are crucial for a successful transition. Your plant will thank you with vibrant growth and renewed health.
Pruning and Inspecting for Optimal Growth
Pruning is a crucial step in repotting that ensures your philodendron stays healthy. After gently removing the plant from its pot, I inspect the roots for any signs of rot or damage. This step is vital to prevent any issues from affecting the plant’s health in its new home.
Trimming Damaged or Overgrown Roots
I use sanitized pruning shears to trim any brown, mushy, or overgrown roots. This process encourages healthier new root growth and helps prevent the spread of disease. I also inspect the soil to see if extra potting mix is needed during the transplant.
Through experience, I’ve learned to look for specific signs that guide my pruning process. It’s important not to over-prune, as this can stress the plant and slow down regrowth. Keeping a bit of healthy root material ensures the plant can restart strongly in its new container.
Creating the Perfect New Home for Your Plant
When it comes to giving my philodendron a fresh start, I focus on creating a welcoming environment that supports healthy growth. This means selecting the right pot and potting mix—both crucial for my plant’s success.
Choosing the Right Pot with Adequate Drainage
I always opt for a pot that’s just a couple of inches wider than the current one. This size increase prevents waterlogging while giving the roots room to grow. Proper drainage is key, so I look for pots with well-spaced holes to ensure water flows freely. My experience with materials ranges from lightweight plastic to sturdy fiberglass, each with its own benefits. The right pot ensures my plant’s roots can expand, promoting vigorous growth and a robust appearance.
Selecting a High-Quality Potting Mix
The potting mix is just as important as the pot. I choose one that holds moisture but drains well, creating a balanced environment for the roots. This mix supports strong root development, which is vital for the plant’s overall health and growth. A good mix ensures my philodendron stays healthy and thrives in its new home.
| Pot Material | Features | Benefits |
|---|---|---|
| Plastic | Lightweight, easy to clean | Portable, suitable for indoor plants |
| Fiberglass | Durable, modern look | Long-lasting, retains moisture well |
| Ceramic | Porous, stylish designs | Excellent drainage, breathability |
By carefully selecting the pot and potting mix, I ensure my philodendron has the best chance to flourish, with roots that grow healthily and a plant that remains vibrant and strong.
Post-Repotting Care and Environmental Adjustments
After repotting, my philodendron needs a little extra care to settle into its new home. I make sure to water it thoroughly right away to help the soil adjust. Proper drainage is key, so I always check the bottom of the pot to ensure water flows freely through the drainage holes.
Watering, Drainage, and Light Requirements
I place my plant in bright, indirect light to encourage steady growth. Direct sunlight can be too harsh and might cause the leaves to become scorched. Watering is done with care—I check the soil moisture by gently sticking my finger into the top inch of the potting mix. If it feels dry, it’s time to water. This helps prevent waterlogging and root issues.
Ongoing Fertilization and Maintenance Tips
Fertilization is important, but I wait about a month after repotting before resuming. This gives the plant time to adjust. I use a balanced fertilizer to promote healthy growth. Regular pruning also helps keep the plant looking its best. I remove any dead or damaged leaves to prevent the spread of disease and encourage new growth.
By following these care steps, my philodendron continues to thrive. It’s all about creating a stable environment and giving the plant the attention it needs to grow strong and healthy.
Wrapping Up with Final Thoughts and Next Steps
Repotting your philodendron is a simple yet impactful way to boost its health and beauty. By giving your plant a fresh start, you’re providing it with the space and nutrients it needs to thrive. This process not only strengthens the roots but also revitalizes the leaves, making your philodendron more vibrant than ever.
Throughout this guide, I’ve shared practical steps and personal insights to make repotting easy and stress-free. From selecting the right pot and soil to gentle handling and post-care routines, each step plays a role in your plant’s success. Remember, it’s all about creating a welcoming environment that supports healthy growth.
As you care for your philodendron, keep an eye on its progress. Adjust your approach as needed, ensuring the soil stays moist but not waterlogged, and the plant receives the right amount of light. With time and attention, your philodendron will flourish, becoming a stunning centerpiece in your home.
Don’t hesitate to share your experiences or ask questions. Happy planting!