
Understanding Haworthia: An Introduction
I bought a haworthia because it looks like a miniature aloe but shrugs off lower light. Those translucent windows at the leaf tips catch the sun, and the little rosettes sit happily on my desk where a fussier succulent would stretch and etiolate into a sad spindly mess.
Plenty of folks know it as the zebra cactus or pearl plant. Haworthia earns its spot with compact size and snazzy markings, and it works for total beginners and seasoned collectors alike. If you’re new to succulents or just want to grow your collection, this is a friendly place to start.
We’ll cover what makes them tick, how to water without drowning them, the best soil, and how to make more plants for free. Let’s dig in.
Exploring the Unique Varieties of Haworthias
The range across these succulents is genuinely fun to collect. Every species brings its own colors, markings, and textures to the table.
Diverse Species and Their Markings
Leaf markings are the whole personality of a haworthia. Some flash bold dark stripes (hello, zebra cactus), others wear subtle speckles that read like pearls. Those patterns aren’t just pretty, they help you tell species apart at a glance.
The color and texture variety is just as good. Deep green with white stripes, smooth rounded leaves with tiny bumps, each one earns its spot on the shelf. Collecting them gets addictive fast.
Popular Names and Their Origins
The nicknames tell the story. The “pearl plant” gets its name from round, smooth leaves, and the “zebra cactus” from those striping patterns. Knowing the visual cues helps you care for each one, since the basics stay the same but the details differ.
Recognizing traits like a thicker stem or thinner one actually changes how I water, so the names aren’t just cosmetic.
Ideal Growing Conditions for Haworthia Succulents
Get the environment right and haworthia basically takes care of itself. It wants bright, indirect light and gritty, well-draining soil so the roots never sit wet.
- Sunlight and Temperature: Bright, indirect light is the sweet spot. Direct sun scorches, especially midday. Aim for 70-95°F in summer and cooler in winter.
- Soil Composition: A sandy, well-draining mix beats regular potting soil, which stays too wet.
- Moisture Levels: Water sparingly and let the soil dry fully between drinks. Overwatering is the #1 killer.
Nail those three and you’ve built a happy home for them. Consistency matters more than perfection.
Essential Care Basics for My Haworthias
Care is the cornerstone of keeping these alive and looking good. A few simple habits do most of the work.
Watering Practices I Follow
I water when the top inch of soil feels dry, about weekly in warm months and less when it cools off. I keep water out of the rosette so it doesn’t rot from the center.
- Water thoroughly, then let it drain.
- Let the soil dry completely before the next round.
When in doubt, I poke a finger into that top inch. Dry means go; damp means wait.
Fertilizing During Active Growth
During spring and summer I feed a balanced, water-soluble fertilizer at half strength so I don’t burn the roots.
- Fertilize every 4-6 weeks while it’s actively growing.
- Dilute it. Strong fertilizer hurts more than helps.
Skip feeding entirely in the dormant winter months.
| Care Aspect | Best Practice | Frequency |
|---|---|---|
| Watering | Water when top inch of soil is dry | Weekly in summer, less in winter |
| Fertilizing | Use balanced fertilizer at half strength | Every 4-6 weeks in spring/summer |
| Soil Mix | Use well-draining mix | Replace as needed, usually every 2-3 years |
Those basics alone will take you far. Details and attention are what keep them thriving.
Watering Techniques to Prevent Overwatering
Watering is where most people trip up. Too much equals root rot, so I’d rather underdo it.
When and How to Water
Before watering I always check the soil. Finger to the first knuckle, dry means go, moist means wait a day or two.
- Water thoroughly and let it drain.
- Let the soil dry completely between waterings.
Soft, mushy, discolored leaves scream overwatering. Stop and let it dry out if you see that.
A sandy mix is the safety net. I also use offsets to start new plants, which keeps clumps from getting crowded.
A schedule helps, but it’s better to underwater than overwater. Too little is easy to fix.
Lighting and Temperature Requirements for Healthy Growth
Light and temperature do more than water and soil for the look of the plant. I set up the right indoor setup and watch the temps, and the difference is real.
Setting Up the Right Indoor Lighting
I park mine near an east or west window for bright, indirect light without the burn risk. Sheer curtains tame the harsh afternoon. For dark corners I add grow lights, especially in winter. Morning light, less afternoon blast.
Managing Temperature Fluctuations
I keep daytime temps 70-95°F with slightly cooler nights to mimic home turf. No drafts, no heating vents right next to them.
That attention to light and temp built me a thriving indoor crowd. 🙂
Choosing the Best Soil and Fertilizer
The soil and pot matter as much as the plant. Small choices add up to big health differences.
I go with a sandy mix that mimics their African homeland so water doesn’t linger and rot the roots.
- Sandy, well-draining mix prevents waterlogging.
- Add perlite or gravel for drainage and air.
- Unglazed clay pots help control moisture.
When I repot or propagate I tweak the mix but the basics stay. Fertilizer stays light and only in active growth.
Right soil and pot is the foundation. It pays off for years.
Propagation Techniques for Growing New Haworthia
Making more plants is the rewarding part. Offsets or leaf cuts both work with minimal fuss.
Using Offsets and Pups Effectively
Offsets, or pups, are the easy route. I gently separate them from the parent, and here’s the move:
- Let the offset dry a day or two so it won’t rot.
- Twist or cut it off with a few roots attached.
- Plant in well-draining soil and water sparingly until established.
This also thins crowded clusters, which keeps the parent healthier.
Leaf Cutting and Other Methods
Leaf cutting is trickier. I pick plump, firm leaves, let them callus a few days, then set them on gritty soil. Patience, it’s slower.
Propagation is a simple way to share with friends or bulk up your own shelf. Give it a shot.
Troubleshooting Common Haworthia Problems
Even with good care, stuff happens. Here are the usual suspects and the fixes.
Dealing with Overwatering and Root Rot
Overwatering brings root rot. Soft, mushy, discolored leaves mean too much water. Fix it:
- Stop watering and let the soil dry fully.
- Repot into fresh, well-draining soil if rot set in.
Check soil before watering and keep drainage sharp to prevent it.
Addressing Sunburn and Color Changes
Sunburn fades or burns the leaves. If it’s getting blasted:
- Move to bright, indirect light.
- Use sheer curtains for harsh afternoons.
Bad care can also blunt flowering. Catch issues early and they bounce back.
Designing the Perfect Indoor Succulent Display
A great display starts with the container. It sets the look and affects health.
Selecting the Ideal Container
Size matters. Too big swallows the plant, too small cramps it. I match the pot to the plant’s size for a balanced look.
- Terracotta or unglazed clay for moisture control.
- Drainage holes are non-negotiable.
- Consider the plant’s natural form and color.
For a modern vibe I use clean neutral pots so the plant is the star. Pebbles or wood accents add warmth without distraction.
Good design keeps them healthy and looks sharp. Win-win.
| Design Element | Recommendation | Benefit |
|---|---|---|
| Container Material | Terracotta or unglazed clay | Improves moisture control and root health |
| Pot Size | Harmonize with plant size | Creates balanced and elegant display |
| Drainage | Ensure pots have drainage holes | Prevents waterlogging and root rot |
Follow those guidelines and you get a display that’s both stylish and functional.
haworthia: Expert Care Strategies
After years with these, I’ve picked up tricks past the basics. They came from hands-on tries and sources like The Spruce.
One move: small adjustments per species. Some want steady light, others need you to read their growth. Steady light prevents stress like uneven color.
Advanced troubleshooting is the next skill. Past overwatering, I watch subtle texture or color shifts and act early.
For older plants, a repot with fresh gritty soil or a fertilizer tweak brings them back. These methods restore vigor and push new growth.
Adopt the expert habits and your plant stays a stunner. Details and curiosity are the long game.
Seasonal Care Tips for Optimal Succulent Growth
Seasons change the plant’s needs, and my routine changes with them.
Spring and Summer Care Guidelines
Warm months are go time, so I water about weekly and feed regularly, with plenty of bright indirect light.
- Water every 7-10 days in spring and summer.
- Balanced fertilizer at half strength every 4-6 weeks.
- Plenty of indirect sunlight.
Watching them pop with color in spring is my favorite part of the year.
Adjustments for Fall and Winter
As it cools, they go dormant. I water about monthly and stop feeding until spring. Keep them off drafty windows and vents.
- Water sparingly, soil fully dry between.
- Avoid heating vents and drafty windows.
- Bright indirect light, skip direct sun.
In fall and winter I just keep things stable so they rest and survive to grow again.
| Season | Watering | Fertilizing | Lighting |
|---|---|---|---|
| Spring/Summer | Weekly | Every 4-6 weeks | Bright, indirect |
| Fall/Winter | Sparingly | None | Indirect, reduced |
Tuning care to the seasons keeps them in rhythm and vibrant all year.
Integrating Outdoor Elements with Indoor Cultivation
Mixing indoor and outdoor keeps a collection dynamic. I move mine outside in frost-free stretches for real sun, then bring them back in.
Transition slowly. Start in shade, ramp up over a week so they don’t shock. Filtered sun only.
Real light is a powerful tool. Some species love the mix of indoor comfort and outdoor freshness.
| Environment | Lighting | Care Considerations |
|---|---|---|
| Indoor | Bright, indirect (e.g., near a window) | Consistent temperature, controlled watering |
| Outdoor | Filtered sunlight in a sheltered spot | Monitor temperature, protect from extreme weather |
Watch the response. Stressed leaves mean move it. Balance gets you the best of both.
Innovative Ideas for Styling Your Succulent Space
Styling can be playful. Experiment with forms, colors, and arrangements to show off the natural beauty.
The best upgrade is often just location. Bright indirect light brings out color. Try a windowsill or skylight.
Mix species for interest. Pair smooth rounded leaves with bold striped ones. Unusual pots or lights add personality. Contrasting backdrops like wood or metal make them pop.
Small layout changes do a lot. Don’t be afraid to shuffle things around until it clicks.
Deepening My Haworthia Knowledge Through Experimentation
Over the years I ran little experiments to understand my plants. They sharpened my care and showed what works per species and size.
One insight: light and water by size. Smaller ones like brighter indirect light, bigger ones prefer partial shade to avoid burn. Smaller plants need more frequent water, bigger ones drier spells.
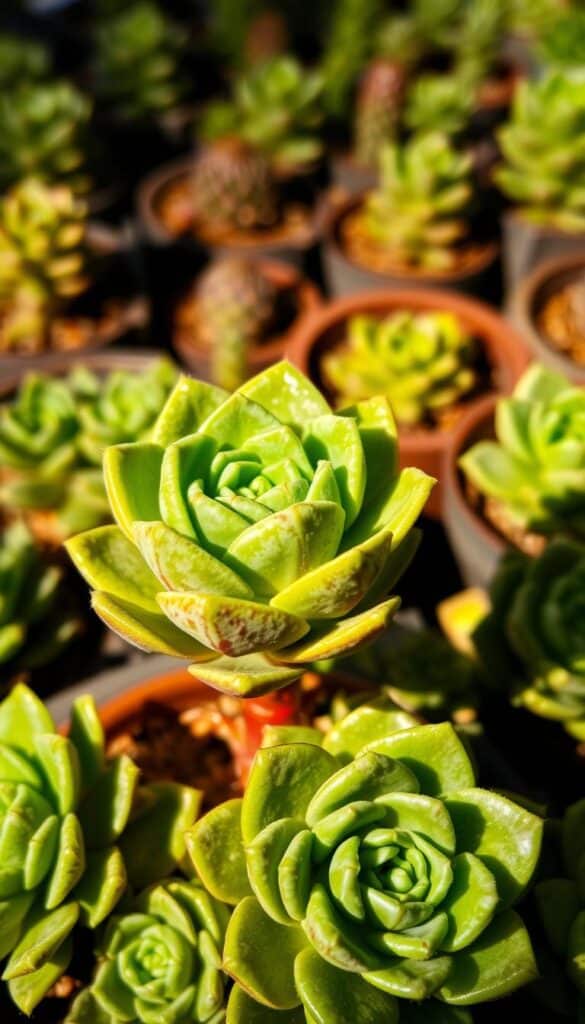
Stem structure matters too. Thicker stems tolerate under-watering better; thin ones are fussier. That changed how I treat individuals.
Rotating every two weeks keeps growth even and prevents leaning. Logging what I see helped me adjust.
Some tricks flopped, like too much fertilizer, and I learned from them. Experiment and log your own findings, it builds a real connection.
Stay curious and the collection keeps improving. :/
The Bottom Line
Haworthias tolerate lower light than most succulents, which is why mine lives on a desk. Use fast-draining soil, water when the leaves feel soft (less often than you think), and don’t fear the offshoots. Give it a shot, your windowsill will thank you.